DIY MeshCore Repeater
//
DIY MeshCore Repeater //
Are you having trouble with your MeshCore Companion Node not reaching all your friends? Try building your own MeshCore Repeater to blast that signal deep into the Meshcore Network
Build designed for Albuquerque’s pre-existing Mesh, but you can probably use it anywhere, especially if other repeaters are in your area
MeshCore Repeater Setup Instructions
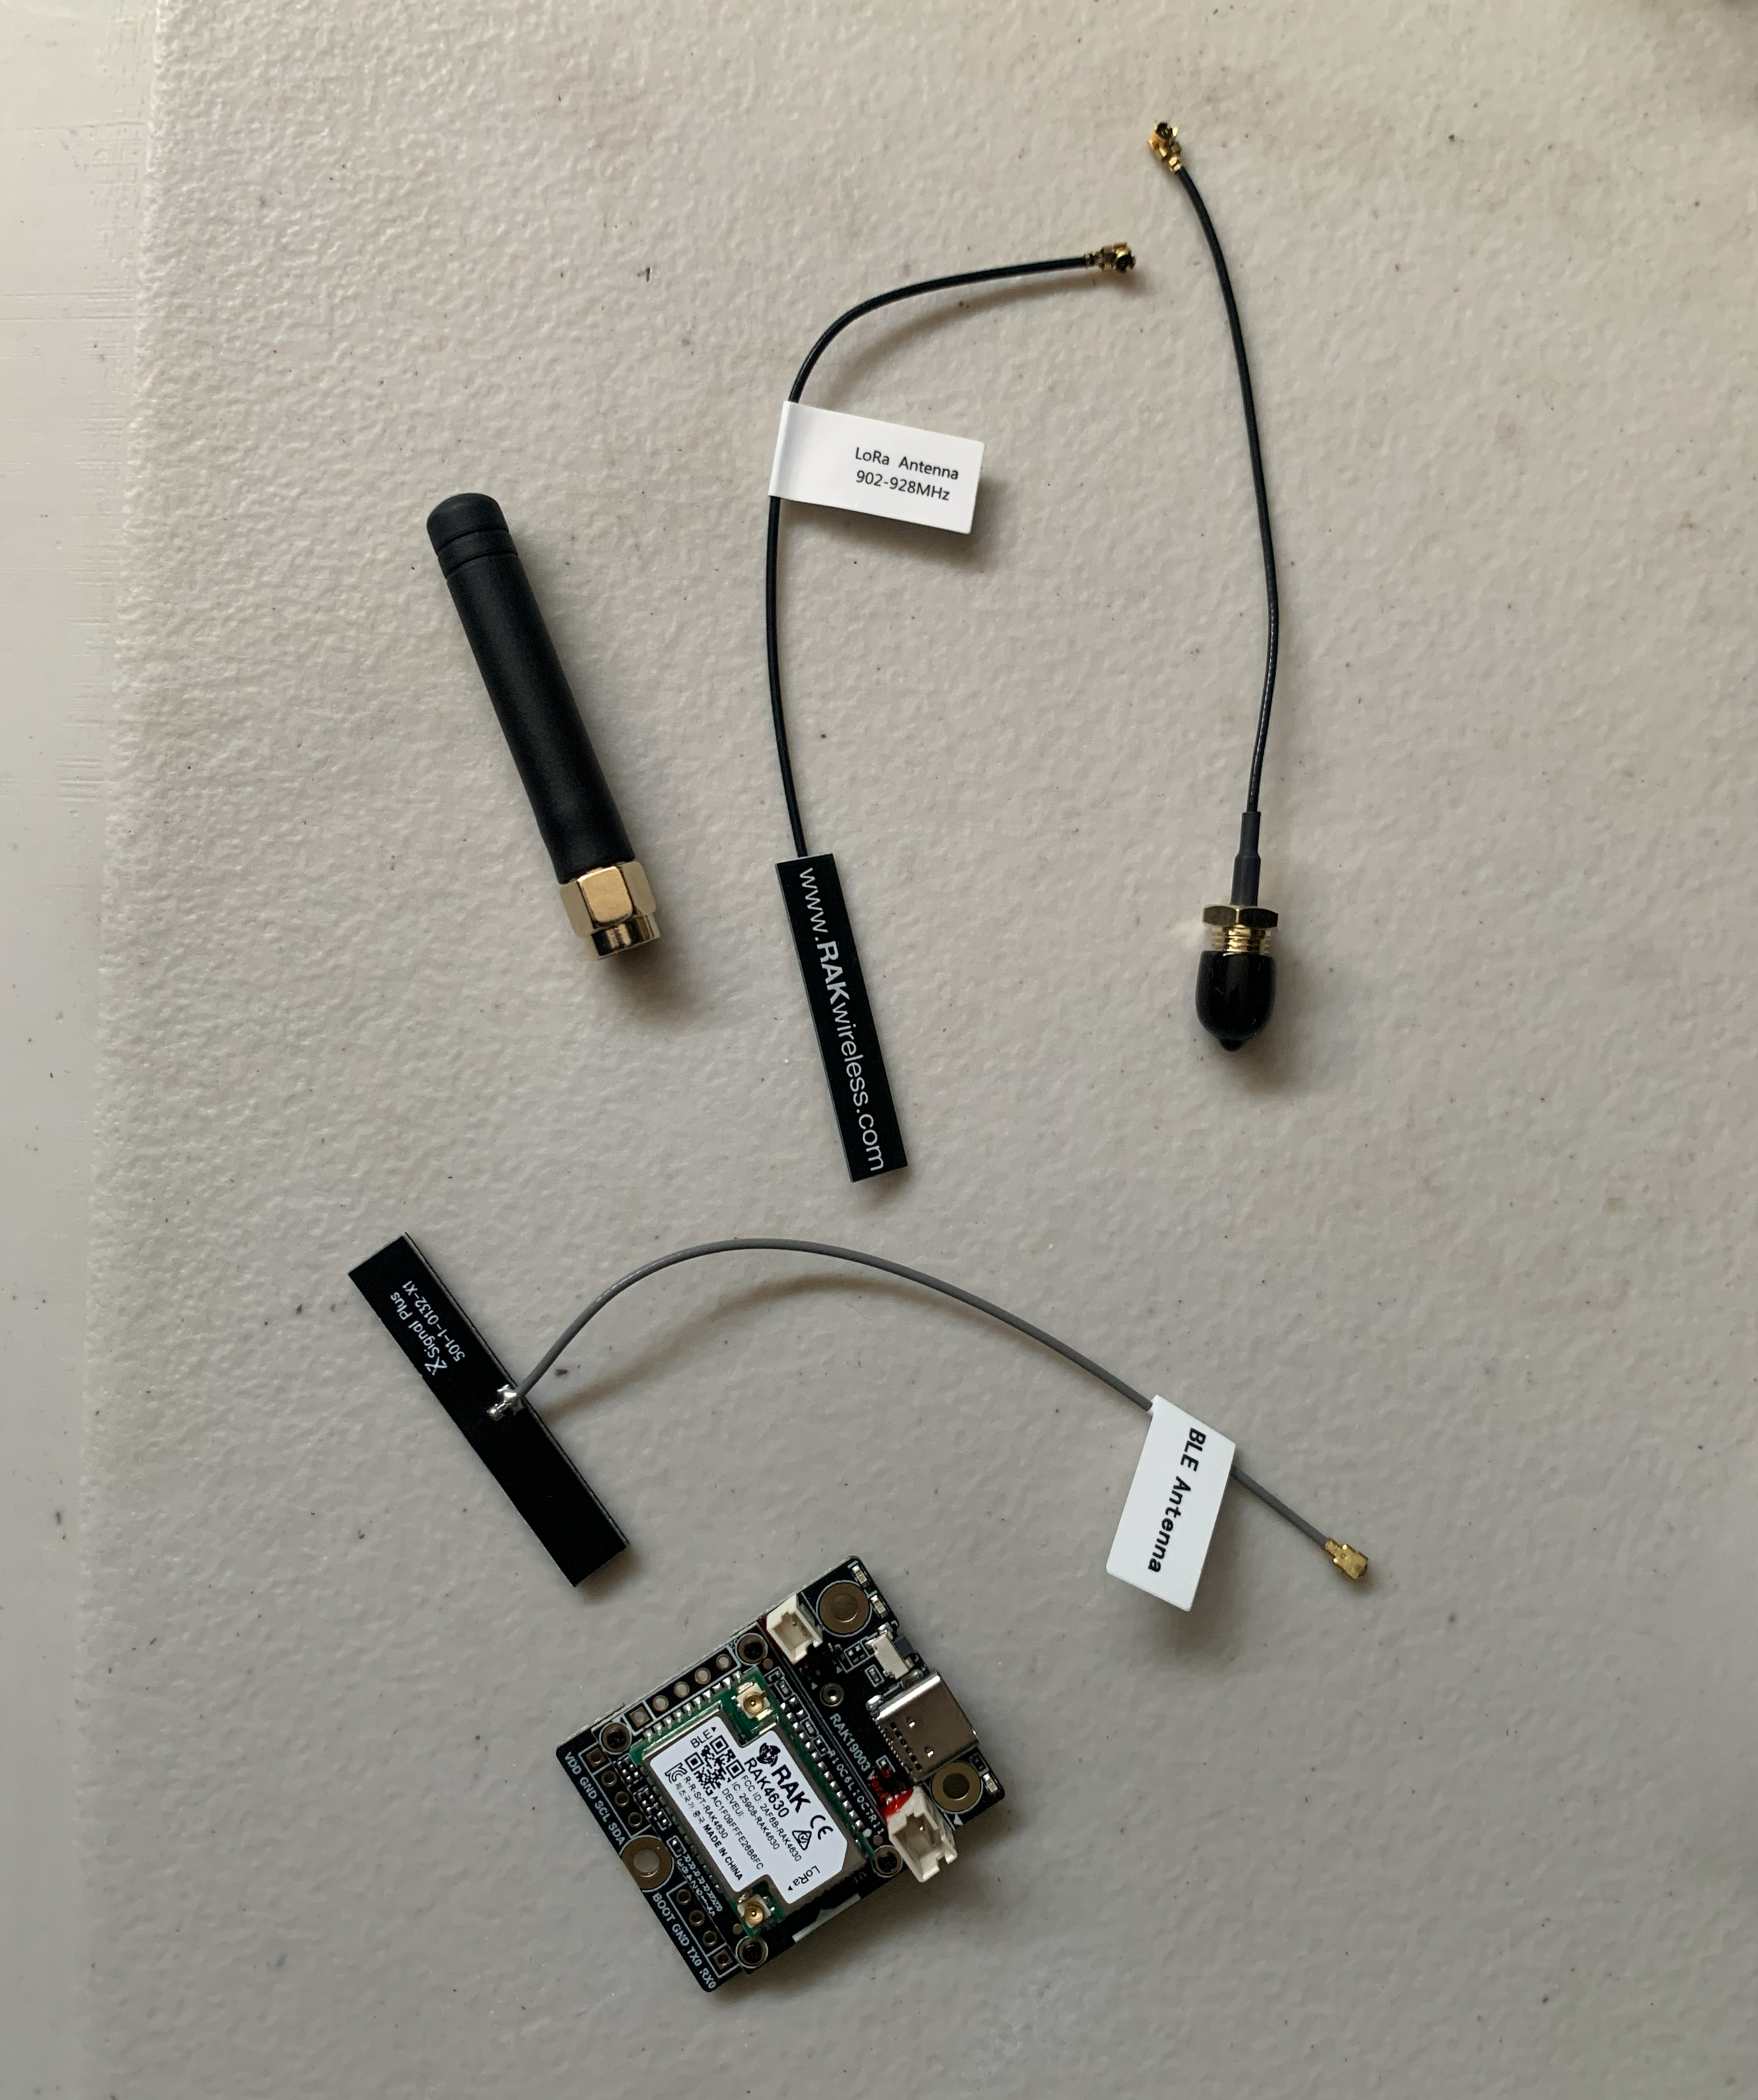
Included in the package when I ordered my RAK 4631 Node:
- BLE (Bluetooth) antenna
- Two different LoRa (long range) antennas
- IPEX-to-SMA LoRa pigtail
- RAK Mesh Node board (It says RAK4630 on the front, but it’s technically just two different boards soldered together and when you do that, I guess that’s when you call it a RAK4631)
NOT SHOWN BUT ALSO USED:
- Larger 915 MHz antenna
- USB-C to USB-A cable
- USB power brick
- Tinfoil and cardboard
- PC
- Another node flashed with MeshCore Companion BLE firmware
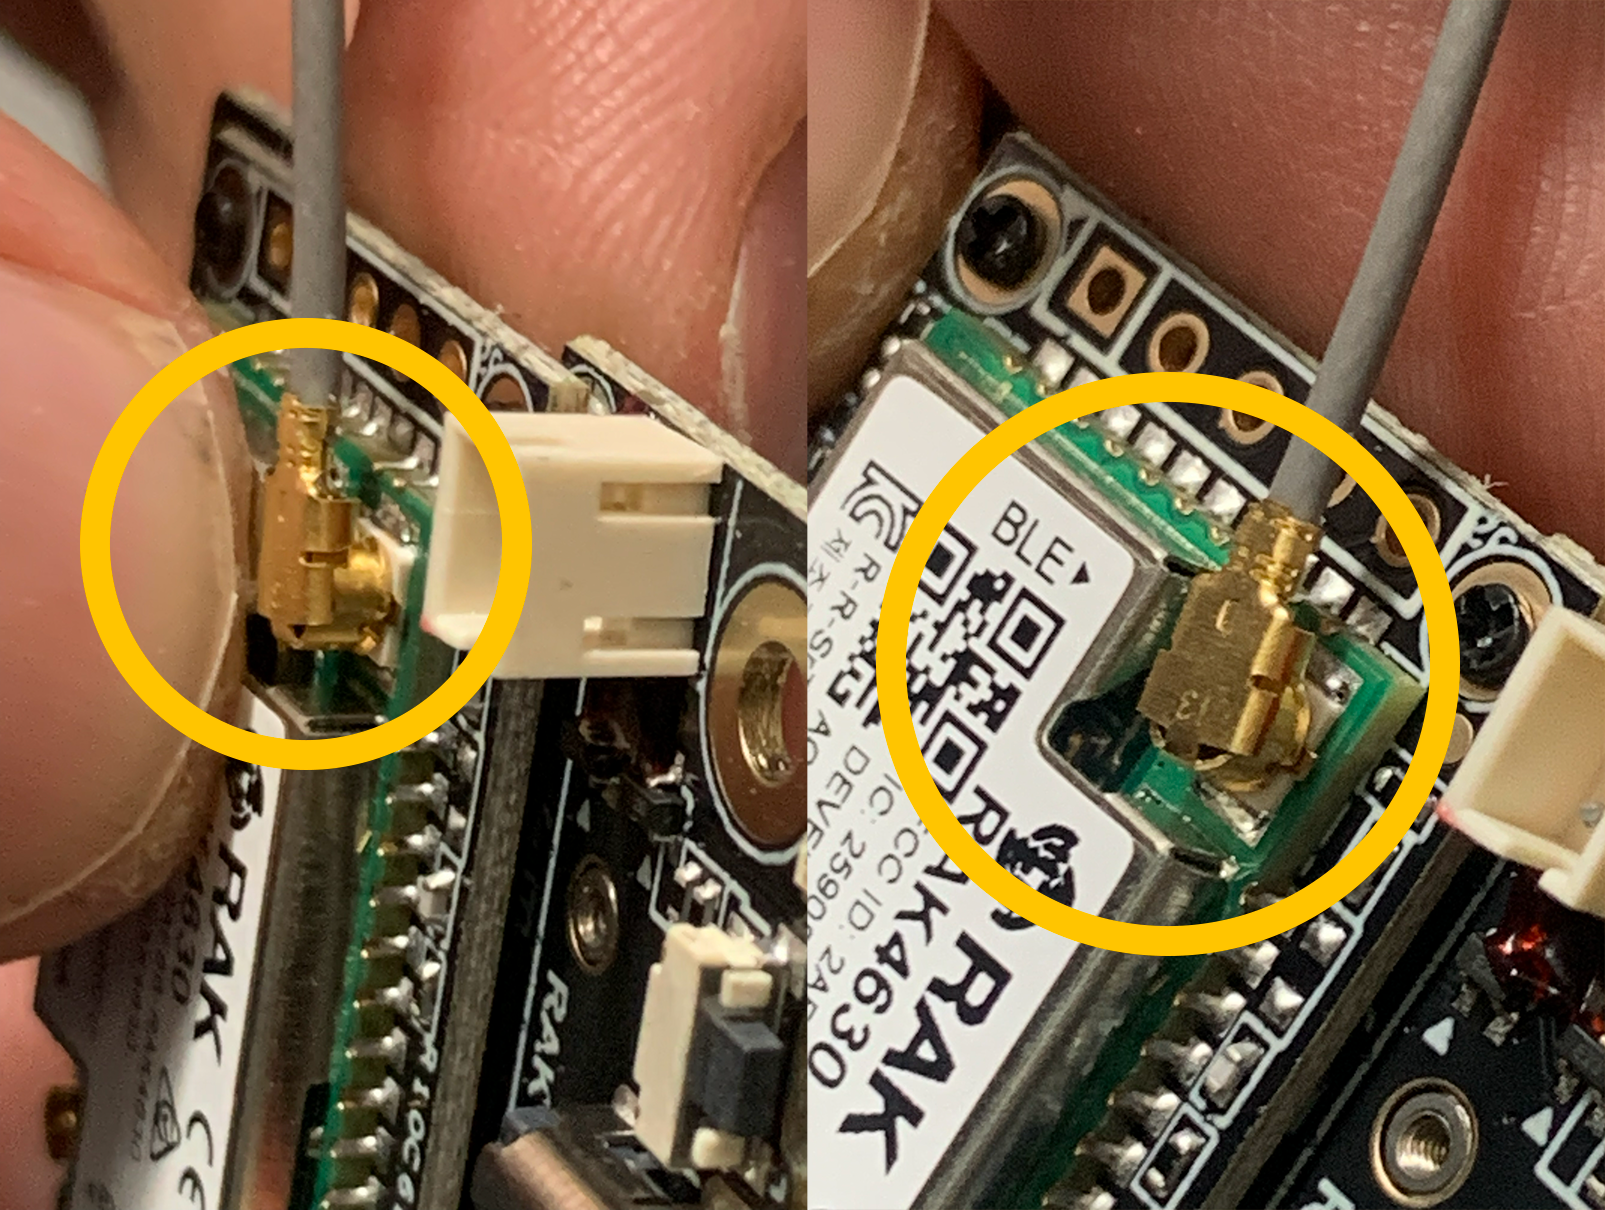
BEFORE CONNECTING YOUR BOARD TO ANYTHING ELSE, connect your BLE and LoRa antennas to the board. If you power the board without connecting the antennas, it might try to send a signal out and fry the circuitry.
The BLE antenna male end (little gold thing) goes into the little tiny female BLE port. It’s a little tricky, so carefully line it up and then push it in. You may have to push it a little harder than you think, but you can do it.
If you have trouble, I used pliers on a really sticky port that wouldn’t connect once. Be careful doing this but you got it.
The male LoRa antenna goes into the female LoRa port. You have two different options to choose from, but for this project we’ll use the IPEX-to-SMA pigtail. Counterintuitively, it’s the one that doesn’t have the LoRa sticker, but the one that is unlabeled and has a little screw on the end.
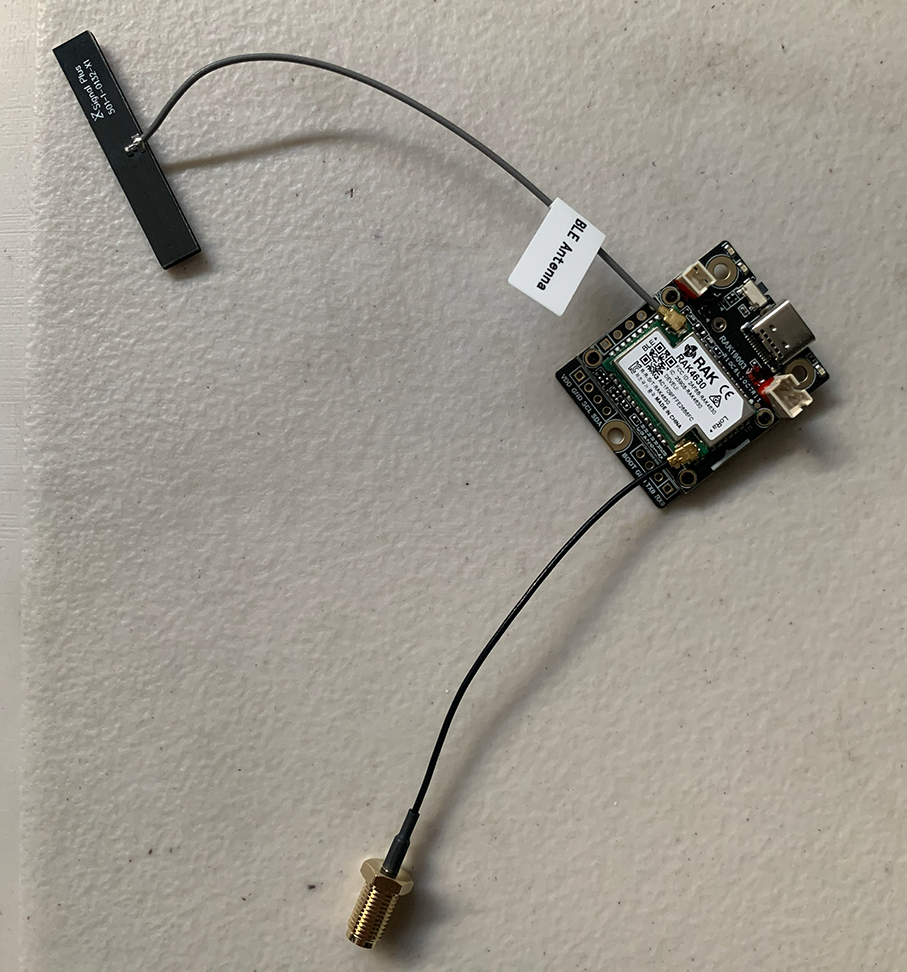
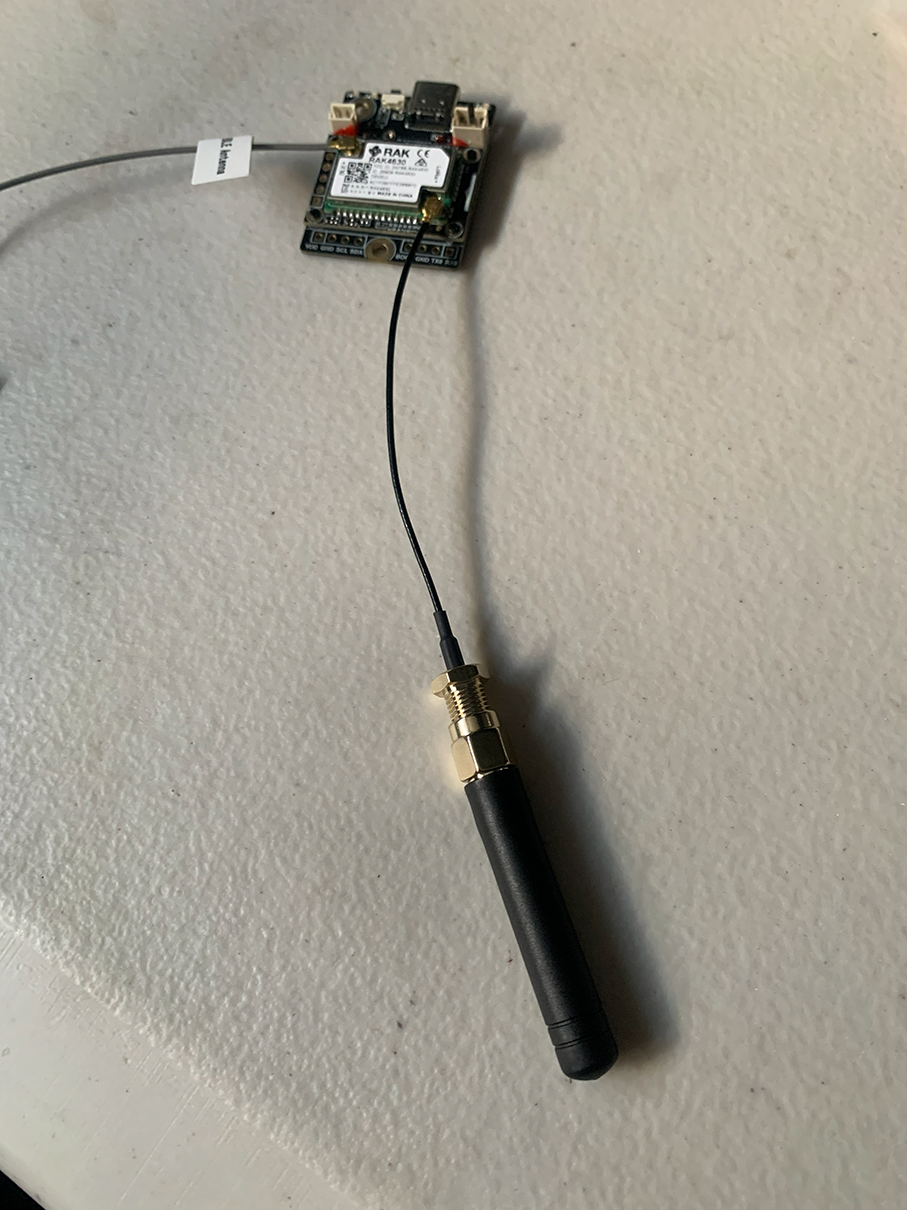
Screw the little black rubber ducky antenna onto it and you’re ready to plug your newly antennaed node into your PC.
Use a USB-C cable with data capabilities. The one I ordered came with a cable that works great, but if you have any USB-C hard drives or something like that, they should work too. If you connect and the light powers on, but you don’t see it listed on your PC later in this tutorial (it probably won’t show up like a thumb drive at first), that’s a good first thing to check!
Rumor has it that you have to use Chrome or another chromium browser to flash images without installing an installer software. I could be wrong, so please email me if there are other browsers that can be used!!
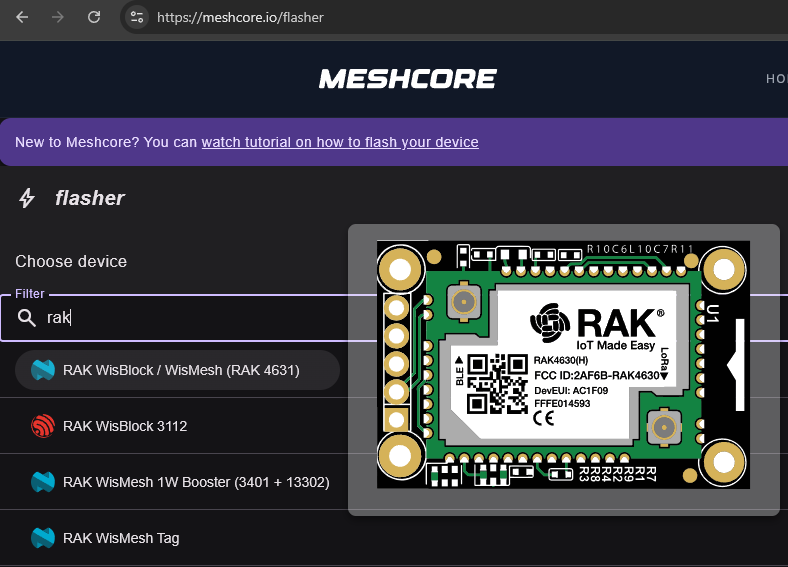
Anyway, log onto meshcore.io/flasher and select your device. There’s a ton of different devices to choose from, so you can search it in the Filter. We are using the RAK 4631, so that’s the one to click.
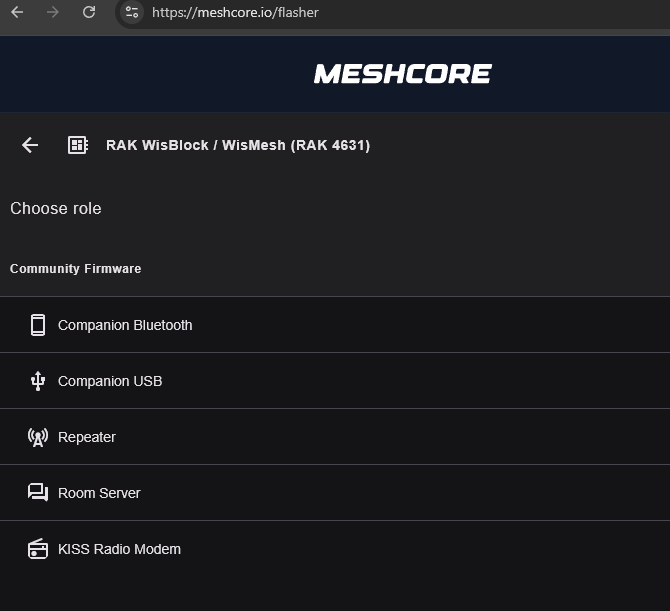
Next, you’ll be prompted to choose a role.
Click Repeater.
If you don’t already have a Companion node, choose one of those options now. This tutorial probably won’t be too helpful going forward, but by all means feel free to pull whatever information is beneficial for you!
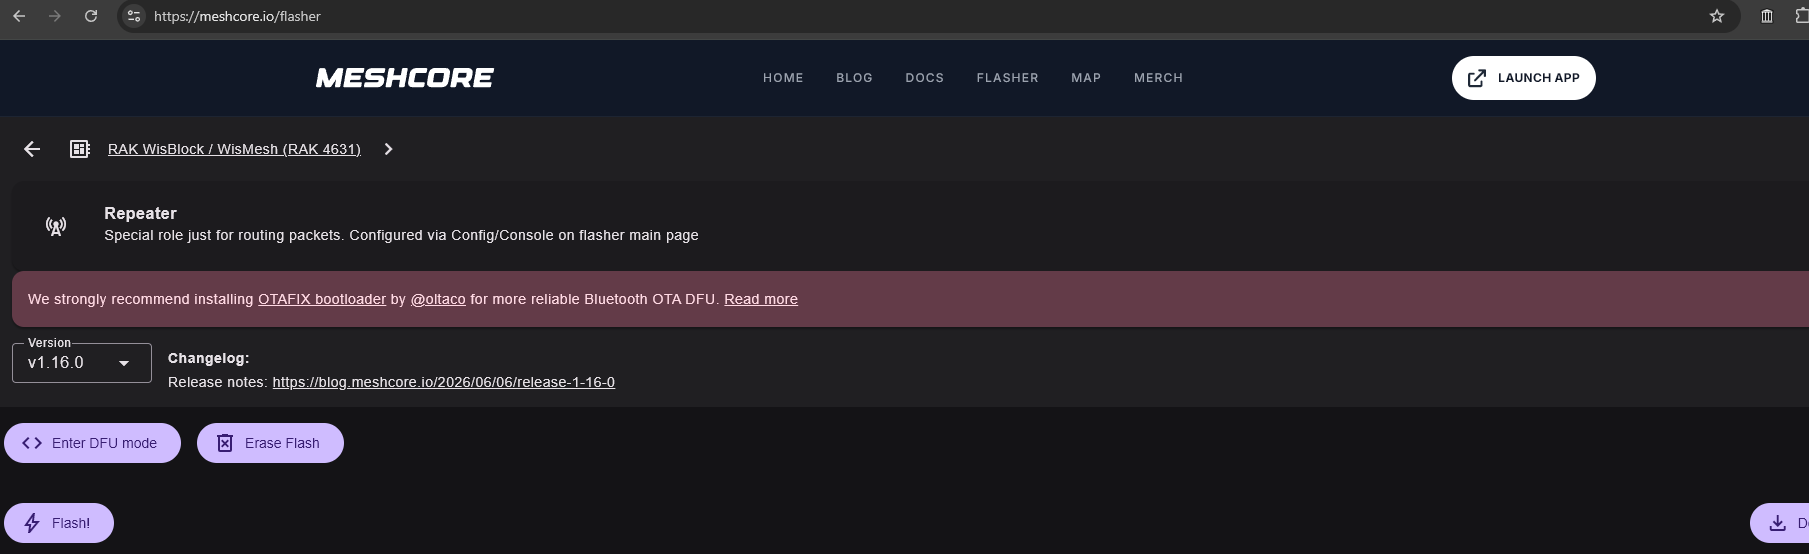
Select your Version (the latest is usually the best),
Click <> Enter DFU mode,
The click Flash!
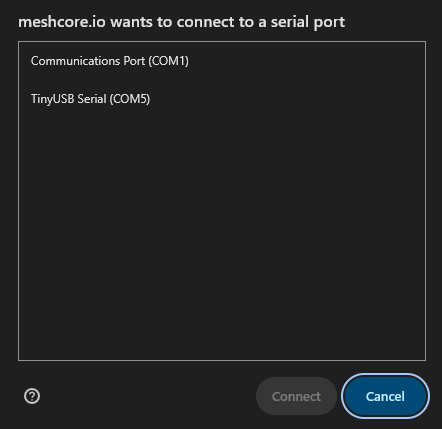
A little pop-up window will appear. If you see multiple ports in the list and you’re worried about flashing the wrong one, press the little tiny “Reset” button (shown below):
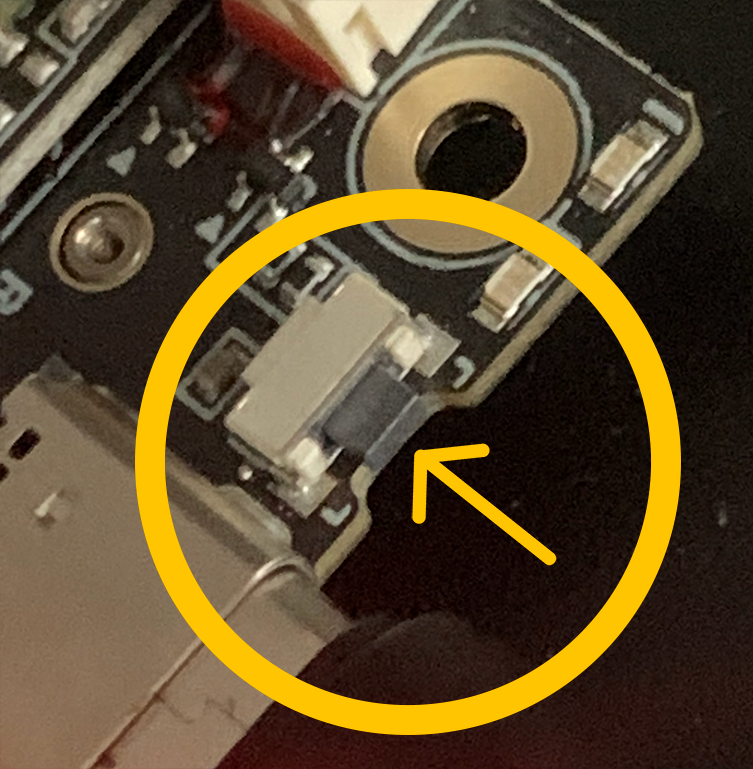
The button is extremely small! it’s right next to the USB-C input if you can’t find it.
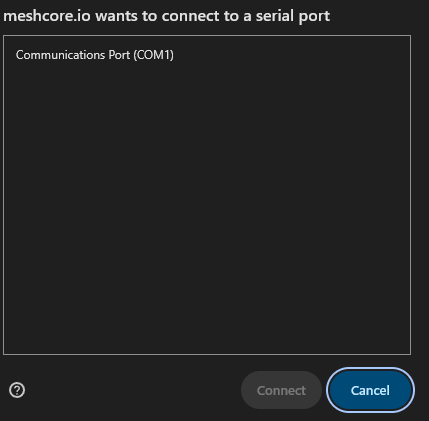
When you press down on the button, the Port connected to your RAK 4631 will momentarily disappear. If it doesn’t return, just unplug your device and plug it back in.
Select your device and then click Connect.
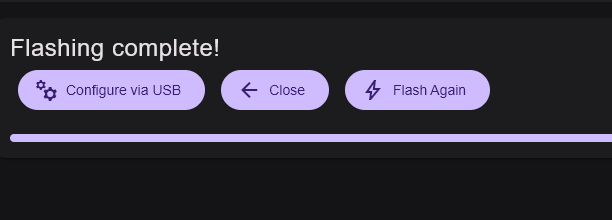
You’ll see a little loading screen for a minute or several, and then the flash should complete!
It’s now time to click Configure via USB.

Click the purple Connect button.
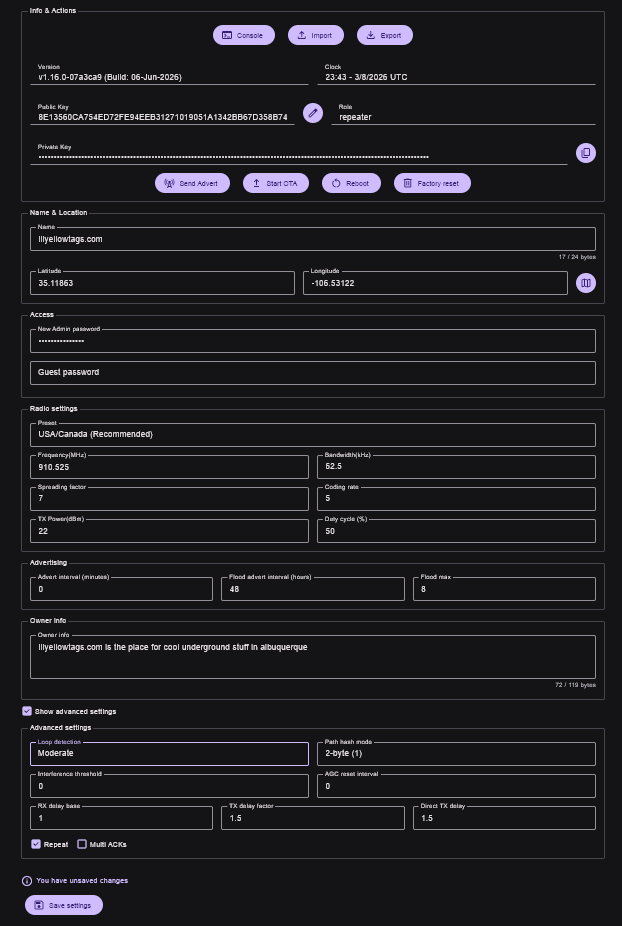
These are my initial settings chosen after looking through https://www.nmmdc.org/, https://www.abqm.net/ and the ABQ Mesh Discord.
I live sorta near the mountains in Albuquerque, NM, and I didn’t want my south-facing window node to get in the way of more powerful repeaters in the area. I may mess around with these settings more once I put this thing in my attic or somewhere higher.
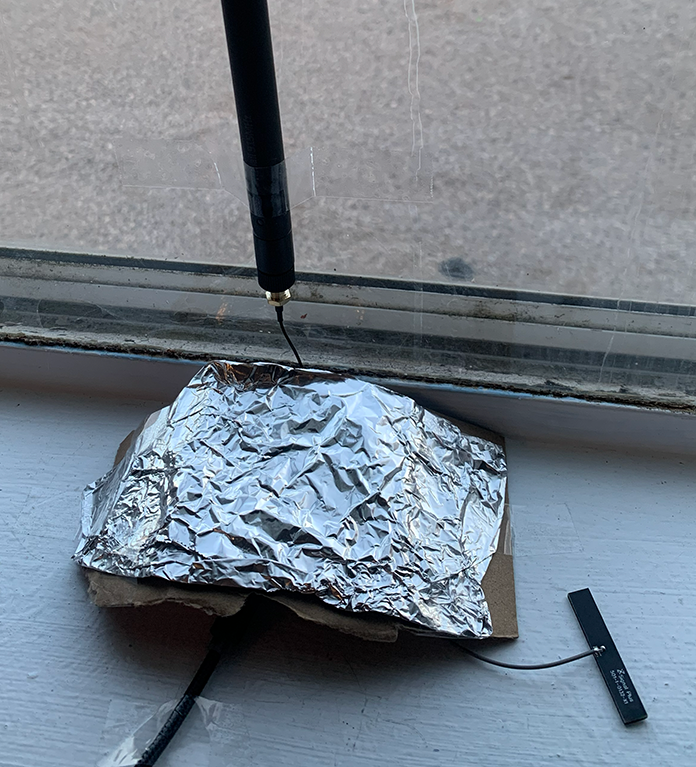
Finally, I made a little tin foil hat by taping tinfoil to a piece of cardboard to hopefully keep the little board from frying in the New Mexican summer sun.
I put the cardboard under the tinfoil so it wouldn’t fall and short out the circuits on the board.
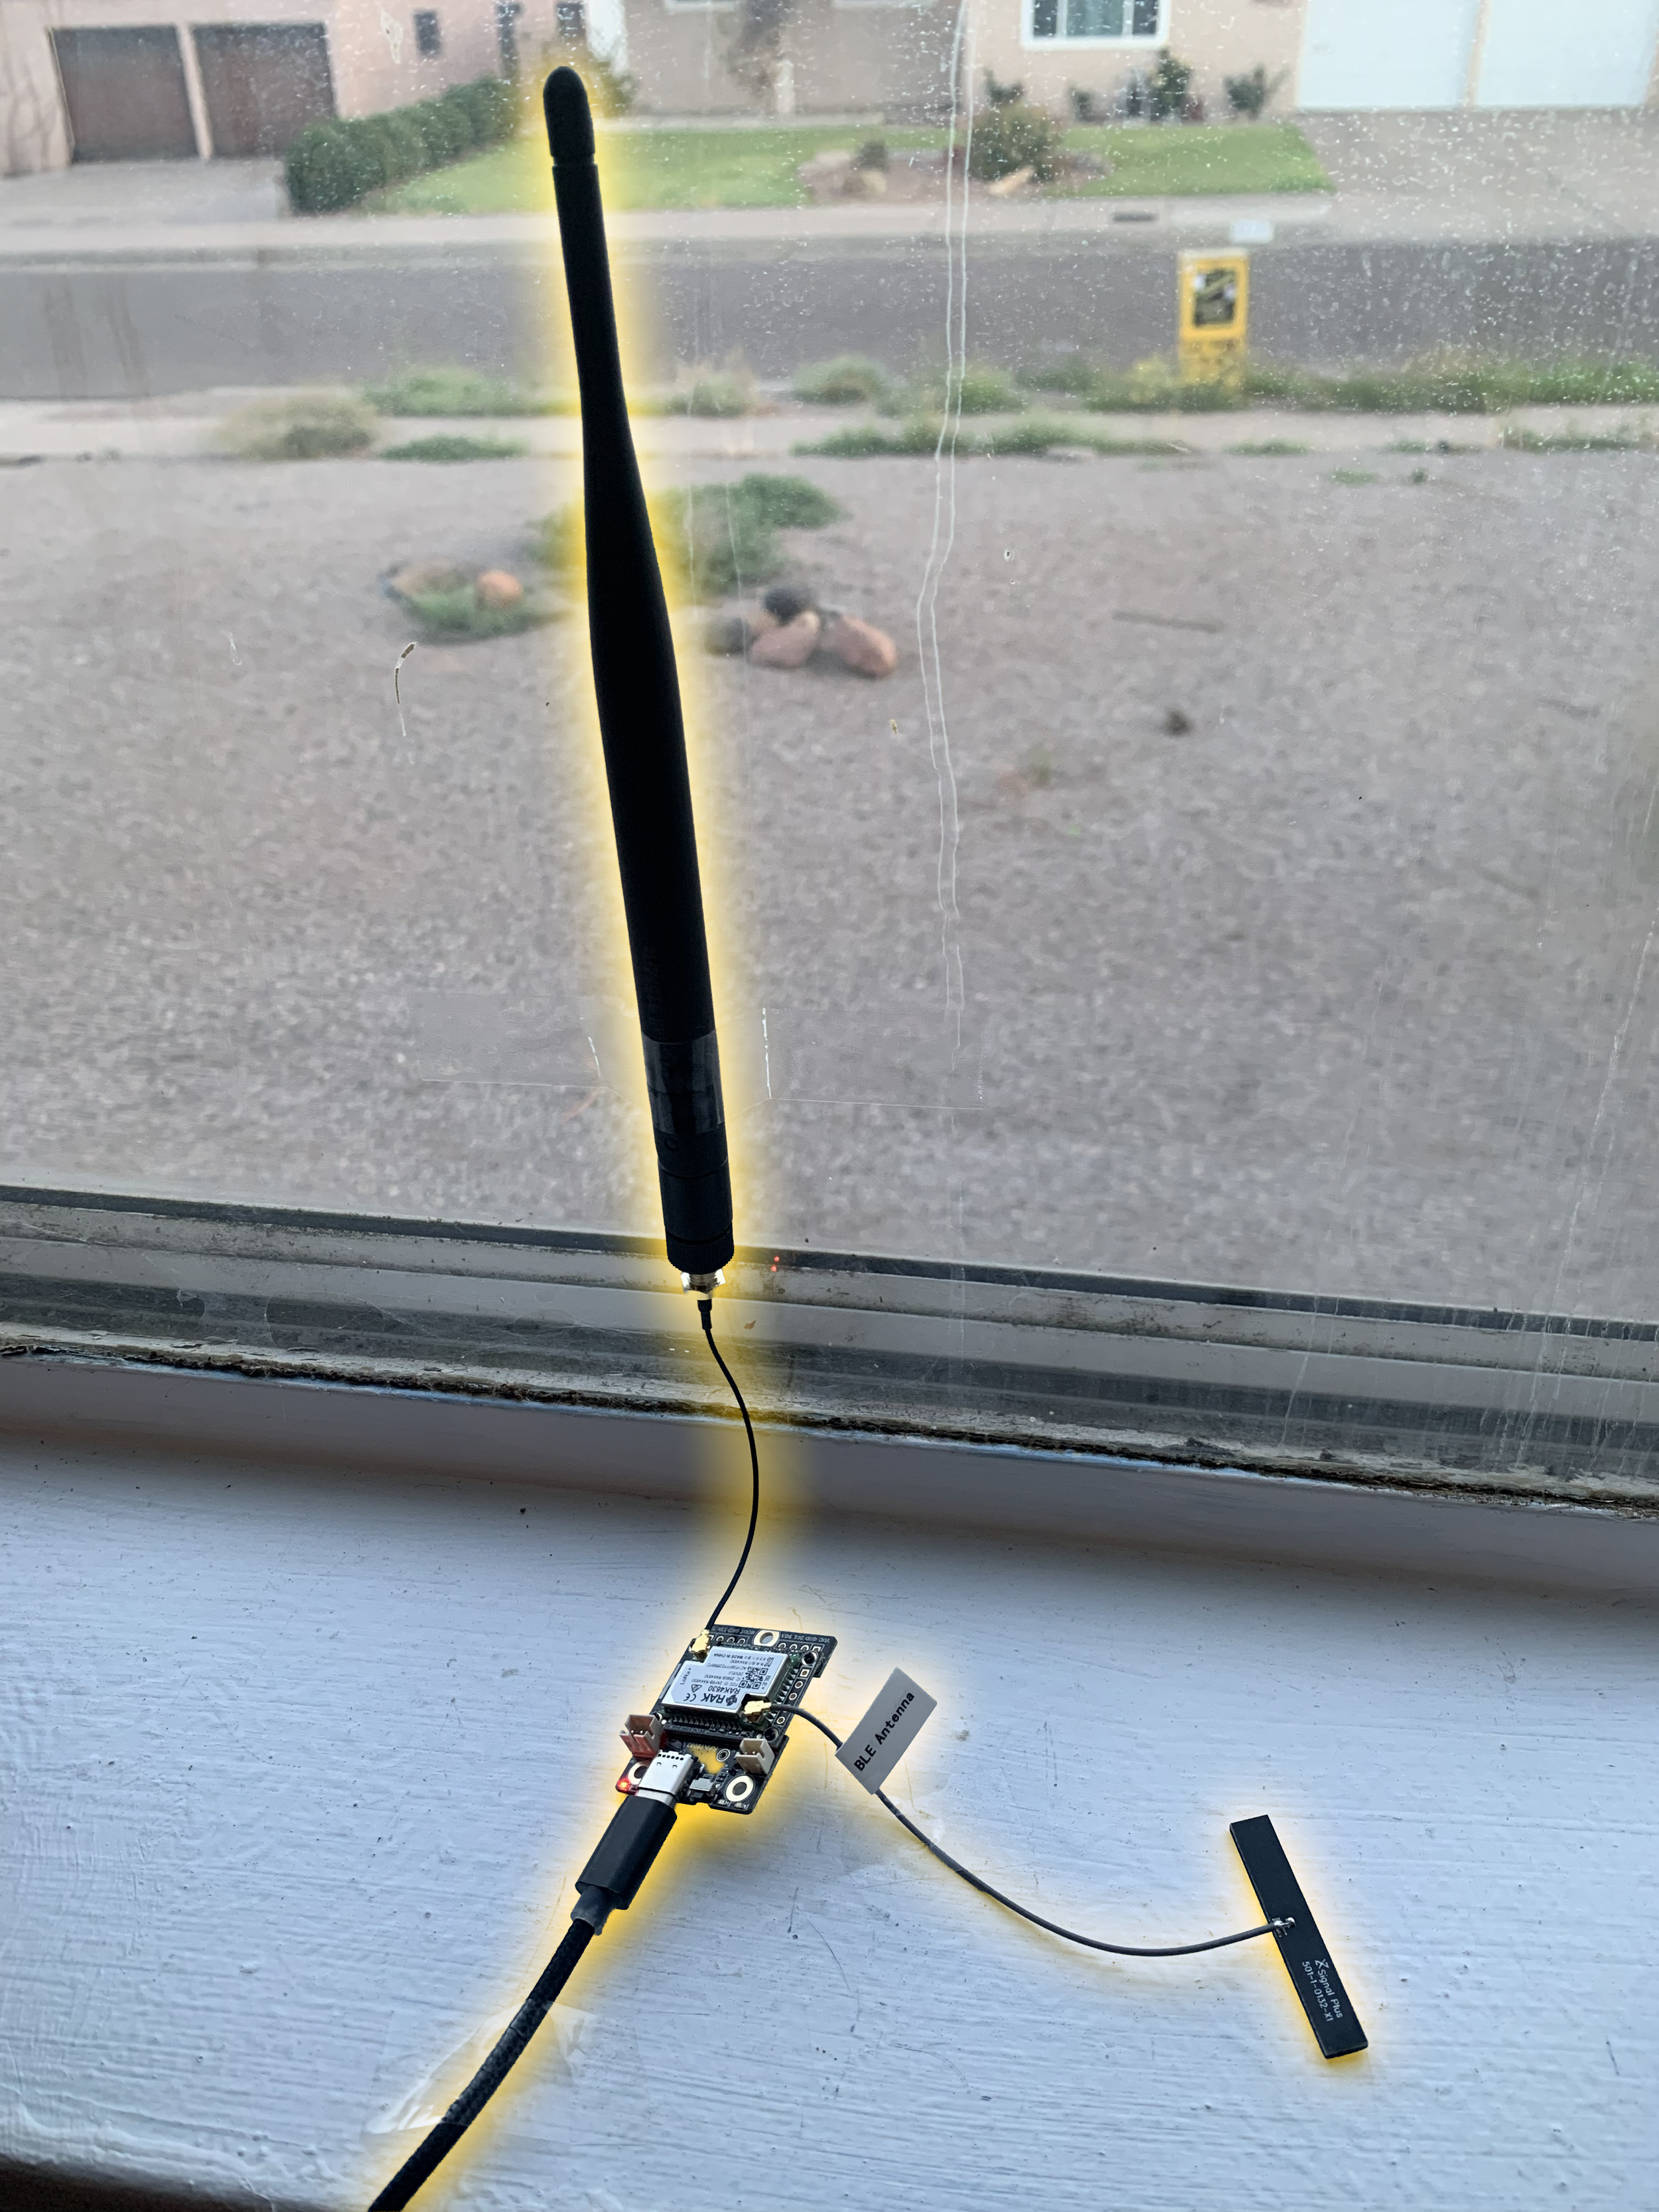
I also replaced the antenna with a larger 915 MHz antenna that I taped to my window.
This was just a temporary fix while I prepared my DIY Solar Roof Mesh Repeater.